
This article is focused on Magento2 default themes, responsive design, implementation of new theme and uninstall theme from Magento2; helpful for frontend theme developers.
In Magento, theme is a component of Magento application which provides a consistent look and feel for entire application area using a combination of custom templates, layouts, styles or images. Magento2 provides two themes Luma and Blank. Luma is known as demonstration theme, where as Blank theme is the basis for custom theme creation. Though there is no restriction to use these default themes but in case of customization, the best practice is to create new theme package. Editing default theme is not recommended because changes can be overwritten by the new version of the default files during upgrades.
Responsive Concept
As all the themes are based on responsive web design, we need to keep in mind the responsive web design concept during developing new theme. Here are few key terms regarding responsive pattern:

Fluid grids: Usually websites are designed in terms of pixels. For responsive web design we need to implement the design in percentage instead of designing in pixels. The simple math formula should be like this –
target / context = result
Flexible Images: Flexible image is very important for responsive design. There are multiple way to resize an image. The most common one is using CSS property “max-width”. By setting max-width as 100%, the image loads in its original size unless the viewing area is narrowed.
Media query: media query consists of a media type and at least one expression that limits the style sheets’ scope by using media features. All devices, like android, iphone, ipad etc. support this media features. While using these media queries and define break points, we should use common break point targets like 320, 480, 640, 768, 1024 and 1440 pixels.

Developing Approch
There are two approaches to responsive web design. Desktop first, where designers and developers are beginning with the desktop version of the website. While considering slower and smaller devices developers and designers remove functions and contents to scale down to the available resources with each devices.
On the other hand, Magento’s Luma and Blank theme is developed based on the mobile first approach. The smart phones are more limited than tablets and desktops in terms of resources. Developers are progressively enhance the functionalities when move to the bigger devices. It means the style of mobile devices are extended by the styles for higher break points. As a result extra styles are never loaded in a view of mobile device.

While developing new theme, it is recommended to extend the Blank theme unless the design matches Luma theme. Luma theme is also inherits Blank theme. Also, it is better practice to reuse Magento UI libraries as much as possible. Magento provides a wide range of UI elements and properties.
Declare New Magento 2 Theme
Step 1:
To create new theme we need to create folder under any of the following locations
<Magento install dir>/app/design/frontend/<vendor>/<new theme>
<Magento install dir>/vendor/<vendor>/<new theme>
Step 2:
The file theme.xml needs to declare for our new theme and in this file we can mention the inheritance of this new theme.
<theme xmlns:xsi="http://www.w3.org/2001/XMLSchema-instance" xsi:noNamespaceSchemaLocation="urn:magento:framework:Config/etc/theme.xsd">
     <title>New theme</title> <!-- your theme's name -->
     <parent>Magento/blank</parent> <!-- the parent theme, in case your theme inherits from an existing theme -->
     <media>
         <preview_image>media/preview.jpg</preview_image> <!-- the path to your theme's preview image -->
     </media>
 </theme>
Step 3:
Adding composer.json is important to distribute theme as a package and register the package on a packaging server.
{
    "name": "vendor/new-frontend-theme",
    "description": "N/A",
    "require": {
        "php": "~5.5.0|~5.6.0|~7.0.2",
        "magento/theme-frontend-blank": "~100.0.*",
        "magento/framework": "~100.0.*"
    },
    "type": "magento2-theme",
    "version": "100.0.1",
    "license": [
        "OSL-3.0",
        "AFL-3.0"
    ],
    "autoload": {
        "files": [
            "registration.php"
        ]
    }
}
Step 4:
To register the new theme into the system, we need to add registration.php on the theme root directory.
<?php
/**
 * Copyright © 2015 Magento. All rights reserved.
 * See COPYING.txt for license details.
 */
\Magento\Framework\Component\ComponentRegistrar::register(
    \Magento\Framework\Component\ComponentRegistrar::THEME,
    'frontend/<Vendor>/<new theme>',
    __DIR__
);
Step 5:
Magento has several types of static files like styles, fonts, JavaScript and images. Each type should be stored in a separate sub-directory inside theme folder.
Finally the theme structure should be like this
app/design/frontend/<Vendor>/
├── <theme>/
│   ├── etc/
│   │   ├── view.xml
│   ├── web/
│   │   ├── css/
│   │   │   ├── source/
│   │   ├── fonts/
│   │   ├── images
│   │   │   ├── logo.svg
│   │   ├── js/
│   ├── registration.php
│   ├── theme.xml
│   ├── composer.json
How to apply new theme
Pre-requisites
Before applying new theme, we need to set Magento application to the developer mode with the following command.
php bin/magento deploy:mode:set developer
If you are moving from Production mode then you need to clear contents from these directories
<Magento install dir>/var/di/*
<Magento install dir>/var/generation/*
Installation with Composer
To install new theme with composer, first we need to create artifact for the repository. Command looks like –
composer config repositories.<vendor>artifacts artifact vendor/<vendor>/packages
After creating artifact, we can install the new theme with the following command:
composer require <vendor>/<new-frontend-theme>:x.x.x (version)
Configure from Admin
- In Admin, go to CONTENT > Design > Configuration. A Design Configuration page opens. It contains a grid with the available configuration scopes.
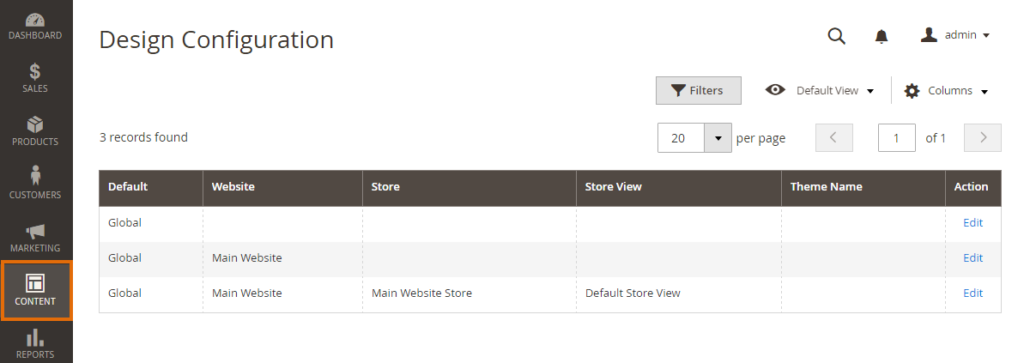
- In the configuration record corresponding to your store view, click Edit.
- On the Default Theme tab, in the Applied Theme drop-down, select your newly created theme.
- Click Save.
- If caching is enabled, clear the cache.
- To see your changes applied, reload the store front pages.
Theme uninstallation
With the following command we can easily uninstall a theme from Magento. Parameter details are given below
php bin/magento theme:uninstall [--backup-code] [-c|--clear-static-content] {theme path} ... {theme path}{theme path} is the relative path to the theme, starting with the area name.
For example, the path to the Blank theme supplied with Magento 2 is frontend/Magento/blank.
--backup-code backs up the Magento 2 codebase.
--clear-static-content cleans generated static view files
The above command uninstalls only themes that are specified in composer.json; in other words, themes that are provided as Composer packages.
If the theme is not a Composer package, in that case we need to uninstall it manually. The steps of manual uninstallation are as follows:
- Remove the theme folder from app/design/frontend/
- Clear the content of var/view_preprocessed/
- Clear the content of pub/static/frontend/
- From database, go to `theme` table then delete the specific theme row.
- Clear cache
Troubleshooting
Everything has been setup properly and configured in correct way but still the changes are not effecting even after clearing the cache. In that case, delete all files from the following directories
pub/static/frontend
var/view_preprocessing
And again reload the pages. You can delete the files manually or run
grunt clean:<theme> command in CLI.
Thank you for scrolling till the end!
Note: This Blog Post is also published on Magento Advent Calendar 2016.